Ways to Tie Your Laces
March 18, 2021
Foot comfort is vital when running, and the way you lace your shoes can make a big difference.
We've gathered four ways to lace your running shoes that accommodate various needs, including heel slipping, toe pain, wide feet, and flat feet. Take a look!
Runner's Loop for Heel Slipping
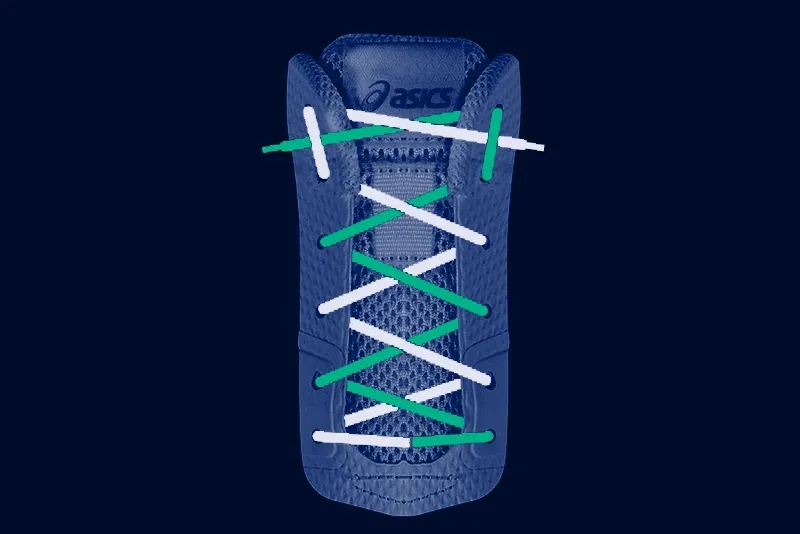
Heel slipping can lead to blisters, pain, and healing time that keeps you sidelined. It can also be distracting during your runs and cause instability that can lead to accidents. Try to solve heel slipping with the runner's loop lacing technique:
1. Lace your shoes normally until you reach the second eyelet to the top on each side.
2. Instead of crossing over again, insert each lace in the last eyelet on the same side as the eyelet below it. This will make a loop.
3. Now, pull the lace on the left through the loop on the right, and vice versa.
4. Finish tying your shoes as usual.
Diagonal Lacing for Toe Pain
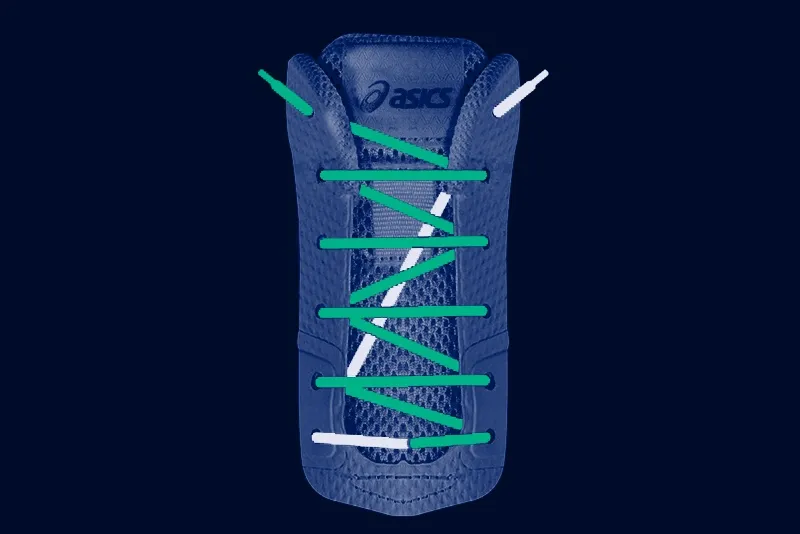
Giving your toes more room to spread out can help prevent toe numbness and pain. It can also provide relief from forefoot discomfort and black toenails. Use this diagonal lacing approach to give your toes more space.
1. Completely remove your laces from your shoes, and put one end of your shoelace through the bottom eyelet closest to your big toe.
2. Pull it through the top eyelet on the opposite side of the shoe. You'll want to pull it through enough to have the length at the top end you normally use to tie your shoe.
3. Now weave the lace at the bottom of your shoe through the other bottom eyelet, from the top of the eyelet to the inside.
4. Continue weaving it back to the opposite side, this time from the inside through to the top of the shoe.
5. Repeat the pattern until the lace reaches the top eyelet, and then finish tying your shoe as normal.
Wide Feet Lacing
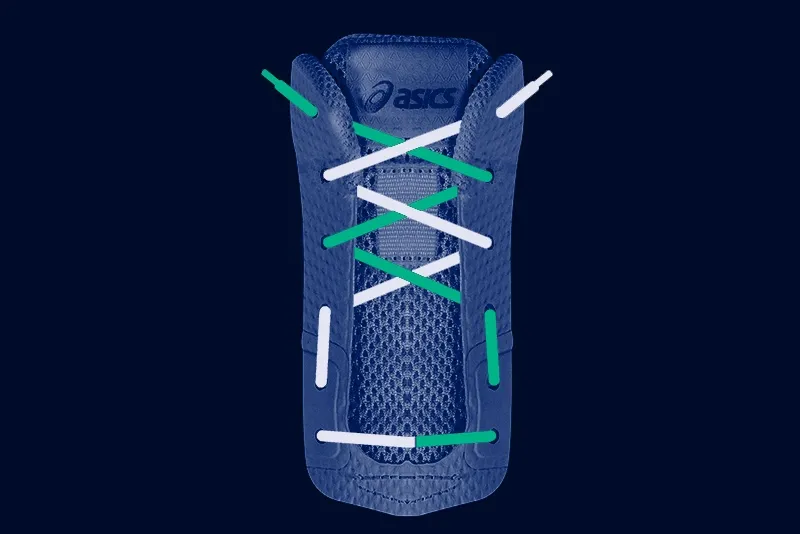
If your wide-width shoes aren't accommodating your foot enough, or you need extra room when wearing a regular running shoe, you can give your feet more space with this lacing technique. It's also a nice preventative measure for when your feet might swell after a lengthy run, such as an ultramarathon. Here are the steps to wide feet lacing:
1. Untie your shoe all the way except for the laces going through the bottom two loops. They should be laced straight across, with the laces on top and going through to the inside.
2. On your pinky toe side, push the lace up through the second eyelet on the same side as the lace.
3. Bring the tip of that same lace straight across to the second eyelet on your big toe side, lacing through the top of the eyelet to the inside.
4. Now take the other lace and push it through the third eyelet on its same side, which will be your big toe side.
5. Lace it straight across to the third eyelet on the opposite side, going from the top of the eyelet through to the inside.
6. Continue lacing in this pattern until you reach the top, and finish tying as usual.

Flat Feet Lacing
Be sure to find a running shoe specifically designed for flat feet for the highest level of comfort when running. You can also lace your shoes in a way that accommodates flat feet. This will help reduce the risk of overstretching your plantar fascia and sustaining trauma to your medial tendons. For flat feet lacing, you'll want a shoe that has a pull loop at the bottom of your laces, between the bottom two eyelets. Use flat fee lacing by following these steps:
1. Run your lace through the pull loop at the bottom.
2. Place each end of your laces through the bottom eyelet on its same side, going from the top of the eyelet to the inside.
3. Lace your shoes as normal, crossing over to the opposite sides, weaving your laces through the inside of the eyelets to the outside.
4. When you reach the second eyelet to the top, don't cross over this time. Instead, put each lace into the eyelet above it on the same side, going from the top of the eyelet through to the inside of the shoe.
5. Now cross your laces over to the opposite side and weave each tip through the loops you just created between the second and top eyelets.
6. Finish by tying as normal.